Introduction
Admin management
Overview
The INFIMA platform has two groupings of administrators based on their scope of access:
- Global admins are stored at the partner level and can access all tenants under that partner.
- Tenant admins can only see one or many specific tenants and have no visibility into partner-level settings.
Within both global and tenant levels, there are two roles:
Administrator role
Administrators have full access to their scope, including:
- Overview and Client Config tabs
- Team tab (Manage Admins) — add, edit, and remove other admins
- Integrations tab (org-level only) — ConnectWise, Autotask, HaloPSA, and Reporting API
- Danger Zone (org-level only) — Client Archive
User role
Users have limited, read-oriented access:
- Overview tab
- Client Config tab
Role summary
The User role is ideal for team members who need visibility into client settings without the ability to manage admins or integrations. The Administrator role is required for anyone who needs to manage the team or configure integrations.
Dashboard visibility by level and role
The following screenshots show the same tenant (Wonka Industries) as seen by three different admin configurations. This illustrates how access level and role determine what is visible in the dashboard.
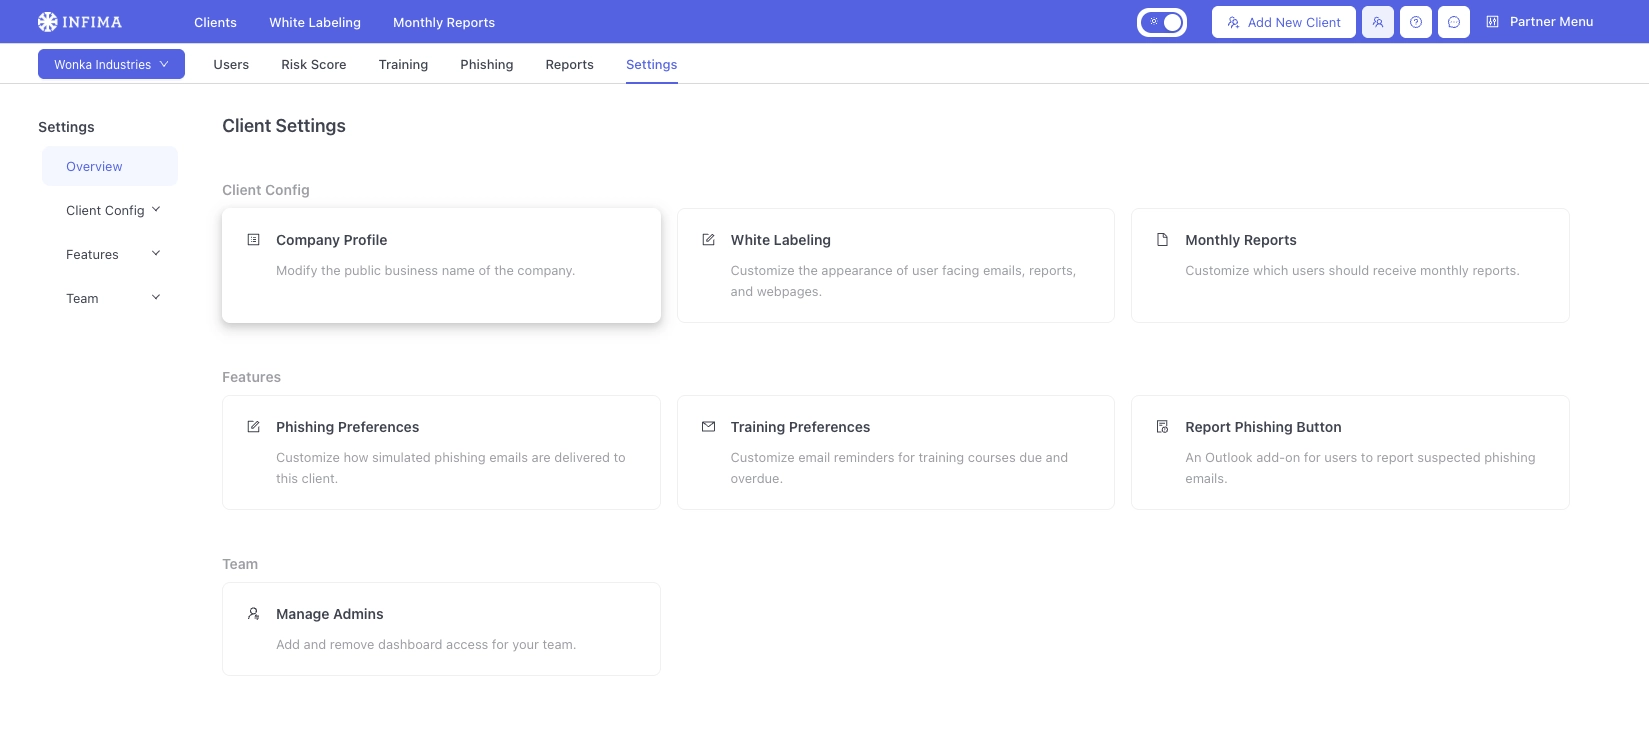
Global (org-level) Administrator
Global admins see the full partner navigation bar at the top of the page, including Clients, White Labeling, Monthly Reports, Add New Client, and the Partner Menu. In client settings, they have access to all sections: Client Config, Features, and Team.
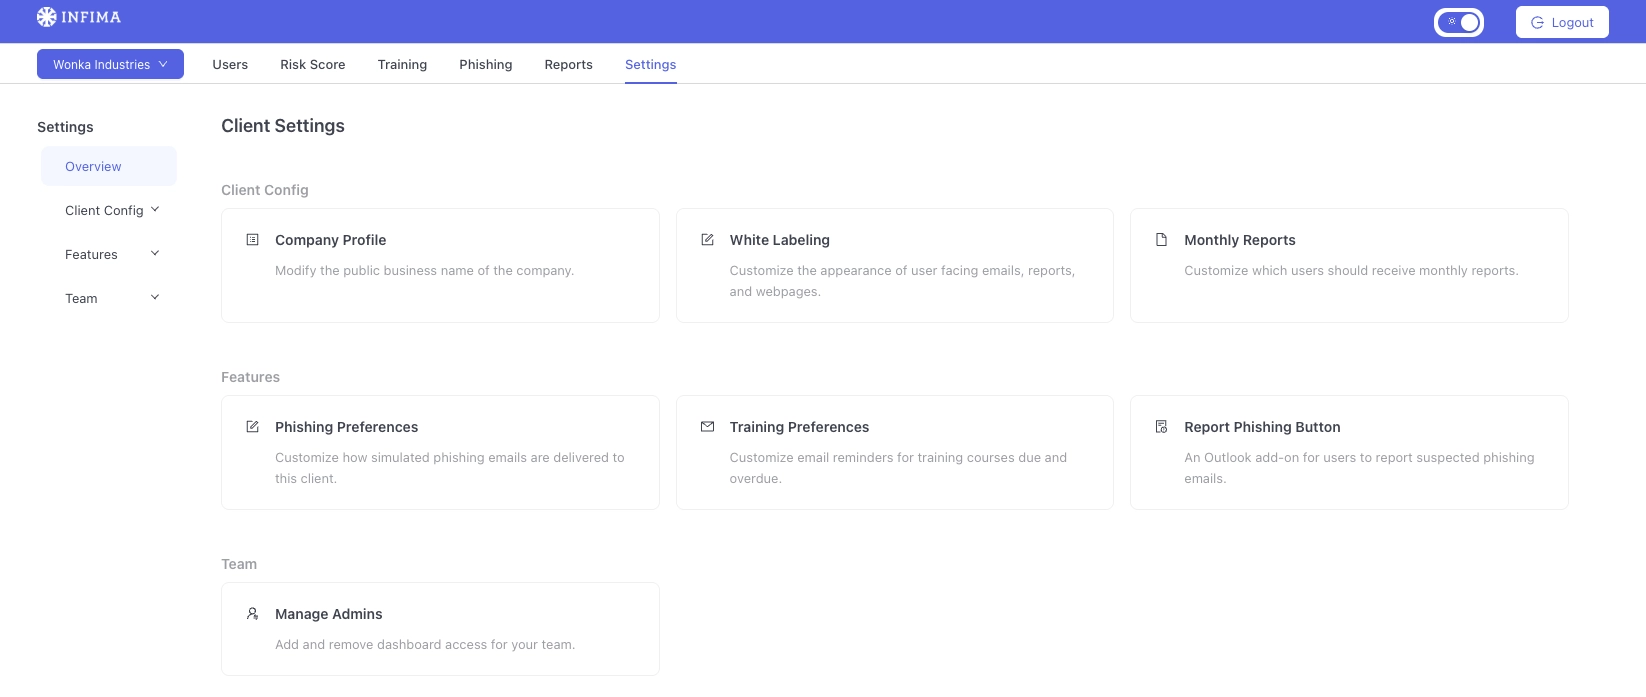
Tenant Administrator
Tenant admins see the same client settings sections — Client Config, Features, and Team — but do not have the partner-level navigation bar. They can only access the tenants assigned to them and have no visibility into partner settings.
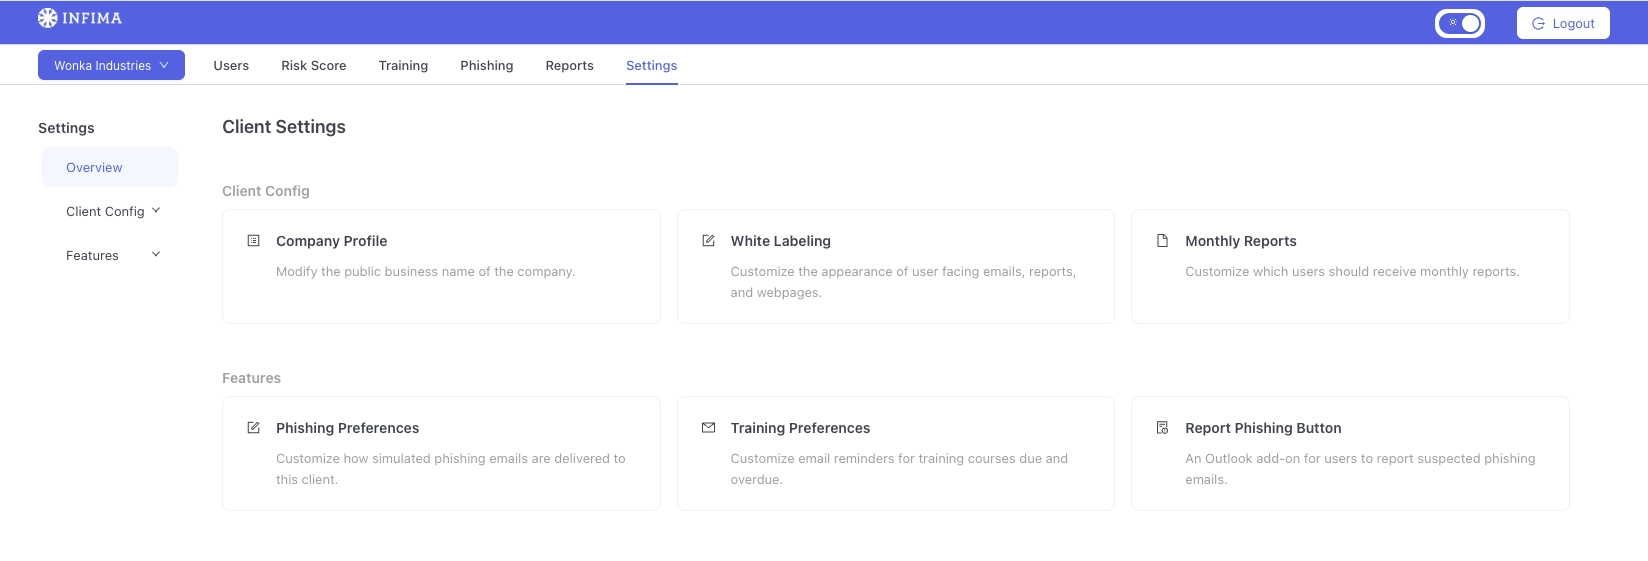
Tenant User
Tenant users have the most restricted view. They can see Client Config and Features, but the Team section is not available — they cannot view or manage other admins.
Adding admins
There are two ways to add administrators to the INFIMA dashboard: SSO (recommended) and Invite.
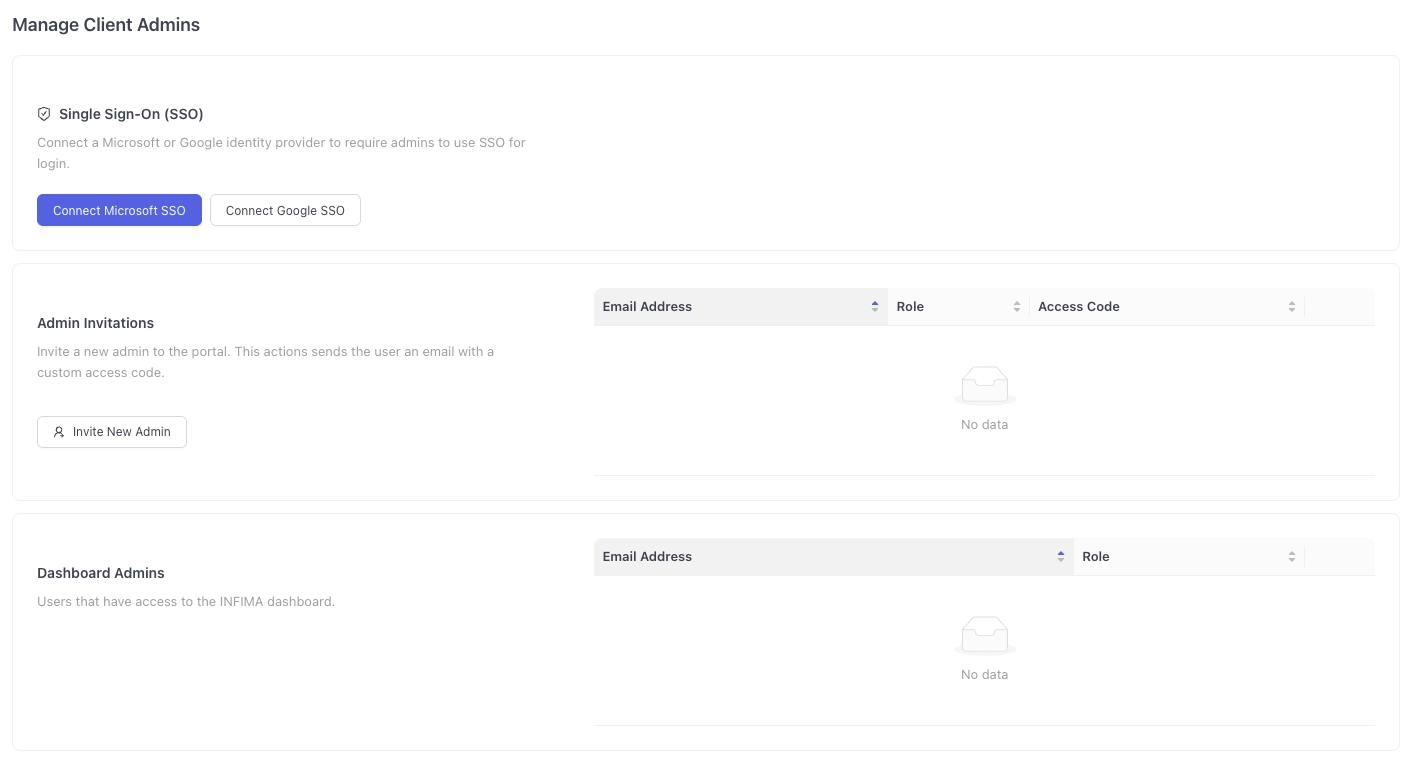
You can access admin management from the Team tab within the dashboard. The Manage Admins page contains three sections: Single Sign-On (SSO), Admin Invitations, and Dashboard Admins.
Adding admins via SSO (recommended)
SSO is the preferred method for adding administrators. When you add an admin through SSO, they are added directly to the dashboard — no invite email is sent. The admin simply signs in to the dashboard using their identity provider credentials to access the platform.
Step 1: Connect your identity provider
From the Manage Admins page, click Connect Microsoft SSO or Connect Google SSO to link your identity provider. Follow the authentication prompts to complete the connection.
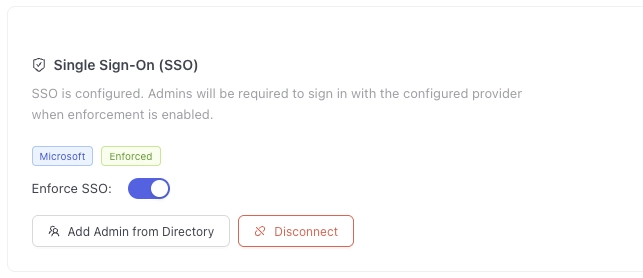
Step 2: Configure SSO settings
Once connected, SSO will show as configured. You can optionally toggle Enforce SSO to require all admins to sign in through the connected identity provider.
Step 3: Add an admin from the directory
Click Add Admin from Directory to open the directory browser. You can search by name, email, or department to find the person you want to add.
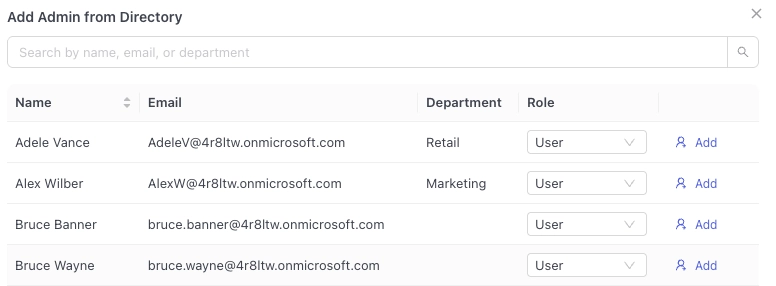
Select the appropriate Role (User or Administrator) from the dropdown next to each person, then click Add to grant them access.
Step 4: Verify the admin was added
After adding, the new admin will appear in the Dashboard Admins section at the bottom of the page with their email and assigned role.
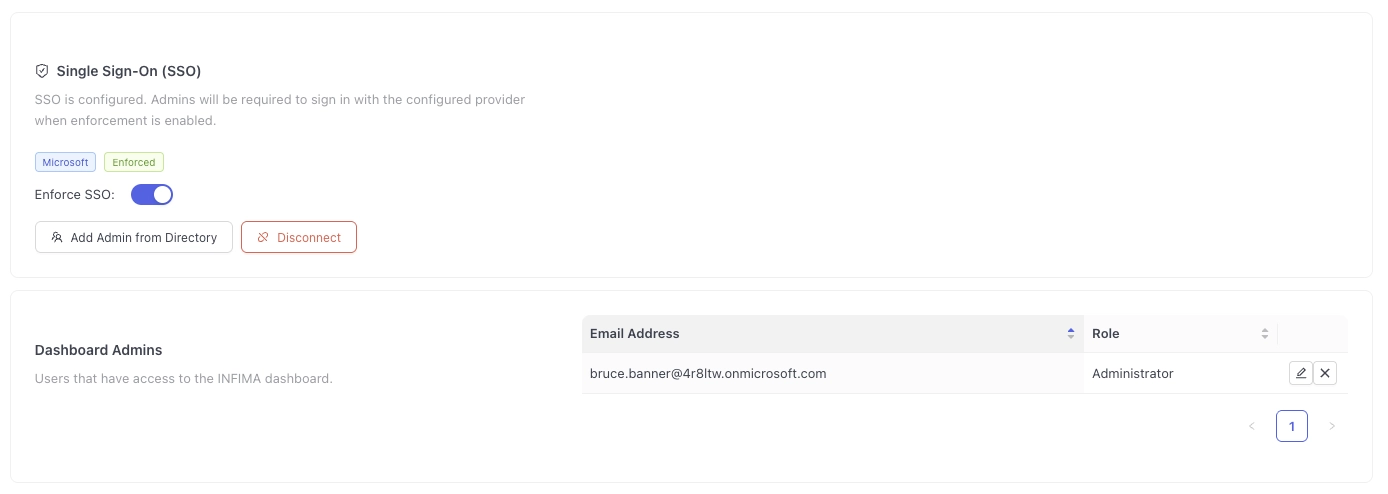
The admin can now sign in to the dashboard using their SSO credentials. No further action is needed on their part.
Inviting admins via email
If SSO is not configured, you can invite administrators by sending them an email with an access code.
- From the Manage Admins page, click Invite New Admin in the Admin Invitations section.
- Enter the admin's email address and select their role (User or Administrator).
- The system sends an email to the admin containing a unique access code.
- The invited admin uses the access code to create their account and access the dashboard.
SSO vs. Invite
Adding admins via SSO is recommended because it eliminates the invite step entirely. Admins added through SSO are provisioned immediately and can sign in right away using their existing identity provider credentials.