Features
White labeling
Overview
With email white labeling, INFIMA's partners can tailor the appearance of emails sent to their clients, making them appear as though they were sent directly by the partner. This facilitates direct client relationships and helps establish a cohesive brand image across all the partner's offerings.
Global Settings
White labeling operates using an inheritance model, where partners can set up customizations once globally and they are applied to all their clients. Each client can also have their own unique white labeling configuration.
To access the current white labeling settings for all clients, navigate to the White Labeling Center by clicking White Labeling at the top of the Partner Dashboard.
Modifying Global White Labeling Settings
- Log in to your INFIMA Dashboard.
- Select Partner Menu > Settings from the Navigation Panel.
- Under Company Config, select White Labeling.
- The Global Settings tab validates that you are updating the global partner settings.
Modifying a Client's White Labeling Settings
Dashboard
- Log in to your INFIMA Dashboard.
- Select the Client you wish to edit from the Client Drop down.
- Select Settings from the Navigation Panel.
- Under Company Config, select White Labeling.
From the White Labeling Center
- Under the column Client Name, click on the Client you wish to edit.
Adding a Logo
We recommend using a transparent PNG format for your logo as it enhances the appearance on emails, web pages, and reports.
Uploading the Logo
- On the White Labeling page, locate the Company Logo section.
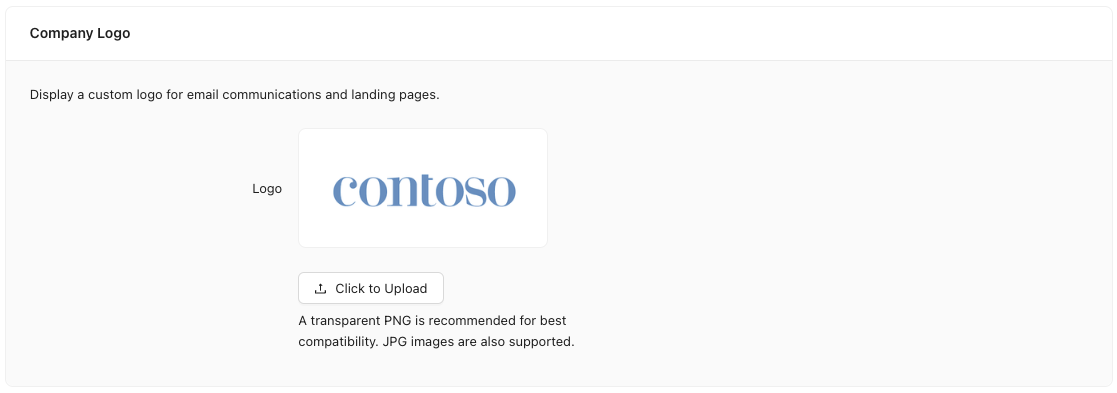
- Click Upload to select a file.
- Locate your logo file and click Open.
- The white labeling logo for your client is now updated.
Customizing Email Sources
Improving training completion rates can be achieved by customizing the "From" address of training emails. When the "From" address is recognizable, users are more likely to trust and comply with the instructions in the email. The "From" address comprises a name and an email, e.g. John Doe <john.doe@contoso.com>
Usage Note
Customizing the source email address is only available for clients that have been synced with Microsoft 365.
Modifying the Sending Name and Email Address
- On the White Labeling page, locate the email source section.

- Update the Sending Name and Sending Email Address inputs.
Usage Note
We recommend setting the sending email address to your ticketing system e.g. support@contoso.com.
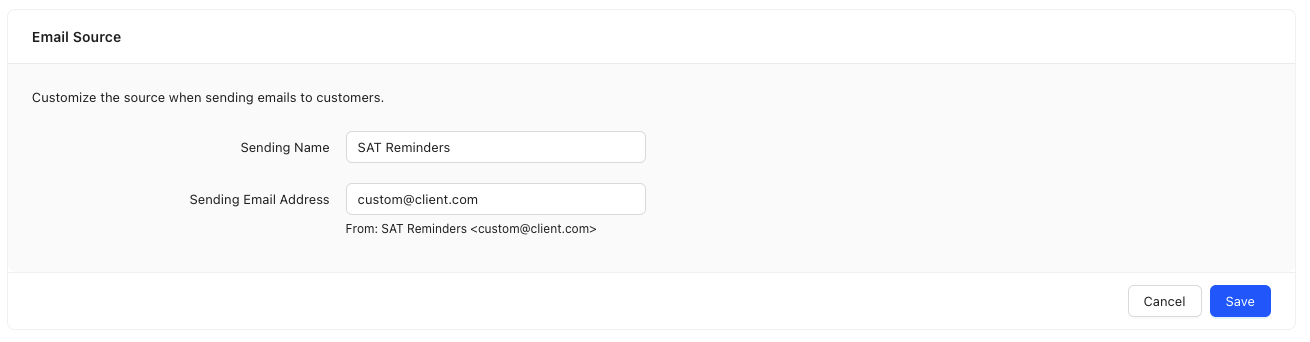
- Click Save to save the changes.